To add a fact to a person, click the + button above the fact list of the Edit Person form. RootsMagic will display the fact type list.
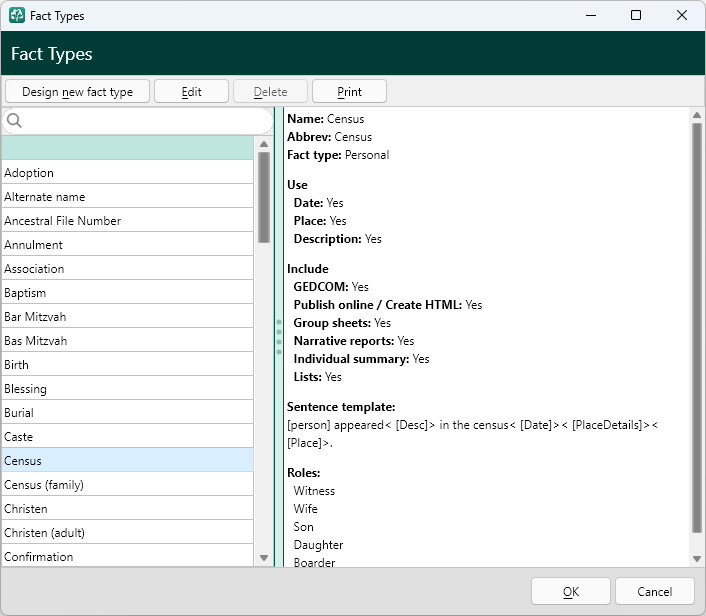
A fact can describe an event, such as a birth or marriage, or something about a person, such as their occupation or religion. You can add as many facts as you need.
To add a fact for a person:
1.Open the person’s edit screen.
2.Click the "Add fact" button to add a new fact, and select the fact type you want to add from the list and click OK.
3.Enter the information for the new fact in the live-edit pane at the right side of the window. Some of these fields may not appear for a particular fact type.
A.Date (or date range) — enter the date, such as 2 Jan 1893, or a range, such as from 2 Jan 1893 to 3 May 1912. If you are unsure, you can use words such as before, after, about, or estimated. RootsMagic also accepts double dates and Quaker dates; see Date formats for the choices and examples. Use Date calculator to work out a date from known information, or Calendar to choose a date.
B.Place – Enter the place where the event or fact occurred. Enter it from most specific to least specific, like "Avon, Polk County, Iowa". As you begin typing in the place name, RootsMagic will begin filling out the place using places you have already typed in. If there is a close match, you can use the down arrow to see if the exact place name is available. You can also click the "Place list " button at the right end of the field to open a list of places from which to select a place name.
C.Place details – Enter the details about the place, such as the name of the church or hospital or cemetery, or the actual address. As you begin typing in the place details name, RootsMagic will begin filling out the place details using place details you have already typed in. If there is a close match, you can use the down arrow to see if the exact place details name is available. You can also click the "Place Details list " button at the right end of the field to open a list of place details associated with the place from which to select a place details name.
D.Description – The description field will appear for facts that need an additional piece of information, like occupation ("teacher") or reference number ("123-45").
E.Proof – Assign (optionally) a proof value to indicate whether a fact, or relationship like spouse, father, and mother, has been proven, disproven, disputed, or proposed. If you select a proof an icon will be displayed next to the fact name.
F.Primary – Turn on if you have more than one of this fact type for a person, and want this one to be the primary one. For example, if you have 2 conflicting birth facts entered for a person, you can check this box for the one you want to be printed on pedigree charts, etc.
G.Private – Turn on if you want this event considered "private". Reports, GEDCOM export, and website creation give you the option of using or excluding the private facts. If you mark a fact private, a lock icon will be displayed next to the fact name.
H.Sort date — controls where the fact appears among the person's other facts, without changing the date printed in reports. RootsMagic fills it in when you enter a date, but you can change it. For example, if you know where someone died but not when, leave Date blank and use Sort date to put Death after their last known event. See Date formats for sorting details.
I.Name fields – The "alternate name" fact type has name fields (given, surname, prefix, suffix, and nickname) as well as a drop list to select the type of alternate name (also known as, immigrant, etc). A name fact will also have a Display option to choose how to display the name (in some cultures a person's name is displayed with the surname (or family name) first).
J.Ordinance status – LDS ordinance fact types have an "ordinance status" drop list to select from.
K.Live – The LDS baptism fact type allows you to choose whether the ordinance was a live or proxy one.
4.The following buttons appear in the fact's live-edit pane letting you access the features directly:
A.Note – Highlight a fact and click this button to add or change a note for this fact. You can also click the box in the fact note column to edit the fact note.
B.Sources – Highlight a fact and click this button to add or change a source for this fact. You can also click the box in the fact source column to edit the fact sources.
C.Media - Highlight a fact and click this button to add or change the media for this fact. You can also click the box in the fact media column to edit the fact media.
D.Tasks - Highlight a fact and click this button to add or change a task for this fact. You can also click the box in the fact task column to edit the fact tasks.
E.Share – Highlight a fact and click this button to add or edit people who share, or were witnesses to, this fact.
5.You can change the fact type by clicking the fact type on the edit panel and selecting a new fact type from the Fact type list. This is useful when you need to do something like change a baptism to christening for example.
6.Use the checkmark in the edit panel heading to accept pending changes, or the circle-with-slash button to discard those pending edits.
7.Click Close to close the Edit Person window. Any changes made in the active pane are saved by this command.
Check the completed fact
After saving, select the fact again and check its person or family, date, place, and sentence preview. For a family event such as marriage, confirm the correct spouse. For an alternate name, check the name type and display order.
Attach the supporting citation to this fact and explain uncertain or conflicting information in its note. If the fact appears in an unexpected position, review Sort date before changing the event's actual date.