Lists all places in the database and the events that occurred in those places. If no event occurred in a place, that place will not appear on your report.
To print a place list:
1.Select the Publish page
2.Select "All reports and charts"
3.Select "Place List"
4.Select your options from the Reports Settings panel:
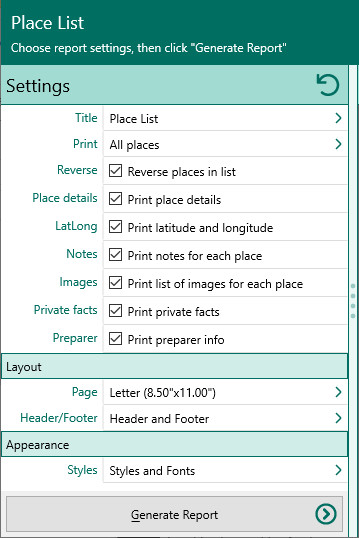
A.Places to print – Choose which places you want to print:
•Print all places in the database
•Print all places (including events)
•Print events in a single place. Use the Select button to choose which place to print the events for.
•Print events near a place. You will need to choose a place, and then select a radius (in miles) that you want RootsMagic to include places. For example, you can choose to include all events within 50 miles of Dallas, Texas.
•Print filtered places. Print all places containing specific text.
•Print filtered places and events. Print all places containing specific text.
B.Reverse place names (groups places geographically) – Check this if you want RootsMagic to reverse the place names so they are listed by largest place name to smallest.
C.Print place details – Check this if you want RootsMagic to include the place details when printing events that happened in each place.
D.Print latitude and longitude if entered – Mark this if you want RootsMagic to print any latitudes and longitudes that you have entered for places.
E.Print notes/history for each place – Select this if you want RootsMagic to print the place note for each place and place detail (if place details are included in option 3 above). Note that private information will be included.
F.Print list of images for each place – Check this if you want RootsMagic to print a list of all the media items attached to the place and place detail (if place details are included in option 3 above).
G.Print private facts – Mark this checkbox to indicate you want to include facts that are marked private.
H.Print preparer information – Select this checkbox to print the preparer's name and address at the end of the list. You enter the preparer's name and address from the "Settings, Preparer" dialog.
5.Choose the various layout and style settings for the report
6.Click the "Generate Report" button to generate the report and display it in the Report Viewer. From there you can modify the report settings, send the report to your printer, or save the report to disk.