Displays an indented list of the highlighted person's descendants. You can print a full descendancy (all descendants of a person), or a direct line descendancy (only the direct line between two people).
To print a descendant list:
1.Select the Publish page
2.Select "All reports and charts"
3.Select "Descendant List"
4.Select your options from the Report Settings panel:
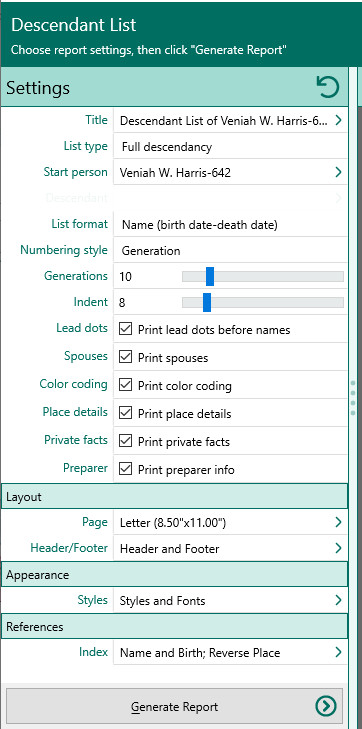
A.List Type – Choose whether to print a full descendancy or a direct descendancy:
•Full descendancy - Select the starting person for the report.
•Direct line descendancy - Select the start person and the direct descendant.
B.Format of list - Choose whether you want to print a single line for each person (name, birth and death date), or a single line for each person with name, birth date and death date in columns, or up to 4 lines for each person (name, birth date/place, marriage date/place, and death date/place).
C.Numbering style - Choose what type of number to print in front of each person's name. You can choose from the generation number, Henry number, D'Aboville number, or outline numbering.
D.Number of generations - Enter the number of generations you want RootsMagic to include in the descendant list.
E.Spaces to indent each generation – Select how much indentation you want for each generation.
F.Print lead dots before each person’s name – Mark this checkbox if you want RootsMagic to print leader dots in front of each person.
G.Print spouses - Mark this checkbox if you want RootsMagic to include the spouses of each descendant.
H.Print color coding - Mark this checkbox if you want RootsMagic to only print details in color for those who have color coding applied.
I.Place details - Mark this checkbox to include place details
J.Print private facts - Mark this checkbox to indicate you want to include facts that are marked private.
K.Print preparer information - Mark this checkbox to print the preparer's name and address at the end of the list. You enter the preparer's name and address from the "Settings, Preparer" dialog.
5.Choose the various layout and style settings for the report
6.Click the "Generate Report" button to generate the report and display it in the Report Viewer. From there you can modify the report settings, send the report to your printer, or save the report to disk.